This is the second article in a four-part series about HTTP security headers and Drupal: what they are, why you should care, and how to implement them to increase the security of your Drupal 7, 8, 9, or 10 site. In this entry, I will be covering how to implement the first header I listed in the introductory article: Permissions Policy.
- Part 1: Introduction
- Part 3: X Marks the Spot
- Part 4: Content Security Policy
The Permissions Policy header allows a site to control which features can be used in the document (for example, microphone, camera, location, etc.) or by iframes in the document. This is a new implementation of the legacy/deprecated Feature Policy header.
Directives and Values
A Permissions Policy header contains one or more directive/value pairs, each associated with a different browser feature. A directive takes only a single value. For an in-depth explanation and a list of all directives and possible values, check out MDN’s documentation for Permissions Policy.
Here is an example Permissions Policy header:
permissions-policy: camera=self, geolocation=*
This header would allow the use of the device’s camera by only the site itself (same origin) – which is generally safe – and geolocation by every origin and embedded iframe (and thus being a potential security risk).
Where to start and how to check headers
First off, if your site is using Drupal 8, 9, or 10, you’re going to need to install the Permissions Policy module. This will help streamline the process by allowing us to set the header directives and values in configuration rather than in code. If your site is using Drupal 7, you’ll be doing things the old fashioned way, in a hook within a custom module.
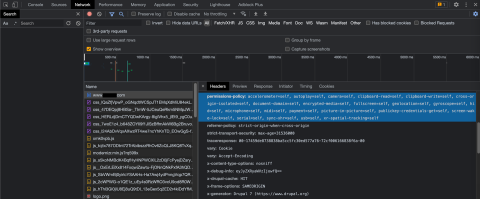
To check the response headers being returned by a site open up the developer tools in your browser of choice to the Network tab, and then restrict the requests to the following type in the type filter tabs:
Chrome: Doc
Firefox: HTML
Safari: Document
Refresh the page and then click the first result, which should be the URL of your website. If a Permissions Policy header is set on the site you will see it listed as permissions-policy under the Response Headers section.

Implementing in Drupal 8, 9, and 10
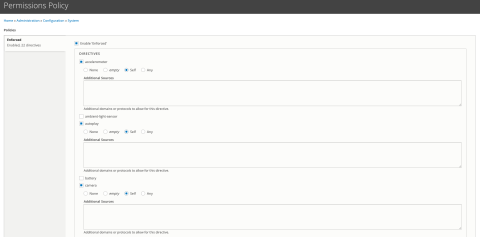
After you’ve installed and enabled the Permissions Policy module, log in and navigate to the module's admin page at /admin/config/system/permissionspolicy. From there, select each directive you would like to enable and a value for them from the radio select options, then save.

Implementing in Drupal 7
Within a custom module, you’ll need to use the drupal_add_http_header() method within HOOK_page_build(). This will add the HTTP header to each page on the site. After you’re finished, the module file will contain something like this:
/**
 * Implements hook_page_build().
 */
function YOURMODULE_page_build(&$page) {
  drupal_add_http_header('Permissions-Policy', 'camera=self, clipboard-read=self, clipboard-write=self, microphone=self');
}
Once you have the Permissions Policy header set, visit your site, double check with your developer tools that the header is being returned and you’re good to go!
In the next article, part 3, I’ll be covering how to implement the Strict Transport Security, X Content Type Options, and X Frame Options headers and then we’ll wrap up in part 4 with Content Security Policy.
Need a fresh perspective on a tough project?
Let’s talk about how RDG can help.
